
Shark Navigator Vacuum Manual: A Comprehensive Guide
This manual provides detailed instructions for Shark Navigator models, including assembly, operation, maintenance, and troubleshooting – ensuring optimal performance and longevity.
Explore guides for NV356E, NV100, and NV650W, alongside safety precautions for a seamless cleaning experience with your Shark vacuum.
Shark Navigator vacuums represent a popular choice for homeowners seeking powerful suction and versatile cleaning capabilities. This series is renowned for its innovative features, like Lift-Away technology, allowing for portable cleaning of stairs and upholstery.
The Shark Navigator line caters to diverse needs, offering models designed for pet owners, allergy sufferers, and those with various floor types. From lightweight options like the NV100 to more robust models like the NV356E and NV650W, there’s a Navigator to suit every home.
Understanding the core functionalities and specific features of your Shark Navigator is crucial for maximizing its cleaning potential. This guide will provide a comprehensive overview, ensuring you get the most out of your investment and maintain a consistently clean home environment.
Understanding Different Shark Navigator Models
Shark Navigator offers a diverse range of models, each tailored to specific cleaning needs. The Shark Navigator Lift-Away Pro (NV356E) excels with its powerful suction and included attachments for versatile cleaning. Conversely, the Shark Navigator Light (NV100) provides a lightweight and affordable option, ideal for smaller homes and quick cleanups.
For those needing robust performance, the Shark Rotator Powered Lift-Away (NV650W) combines Lift-Away convenience with a powered brushroll for deep carpet cleaning. These models vary in weight, features, and price point, impacting their suitability for different households.
Choosing the right Navigator depends on your floor types, pet ownership, and desired level of cleaning power. This guide will help you navigate these differences and select the perfect model for your home.
Shark Navigator Lift-Away Pro (NV356E)
The Shark Navigator Lift-Away Pro (NV356E) is renowned for its powerful suction and versatile cleaning capabilities. Its Lift-Away feature allows for portable cleaning of stairs, upholstery, and hard-to-reach areas. This model includes a dusting brush, crevice tool, and a pet power brush, making it ideal for homes with pets and various floor types.
The NV356E boasts swivel steering for effortless maneuverability around furniture. It features a large-capacity dust cup, reducing the frequency of emptying. Understanding its components and utilizing the Lift-Away function effectively maximizes its cleaning potential. Regular filter maintenance is crucial for sustained performance.
This model is a strong contender for those seeking a balance between power, convenience, and affordability.
Shark Navigator Light (NV100)
The Shark Navigator Light (NV100) is designed for lightweight maneuverability and efficient cleaning on carpets and hard floors. This model offers a streamlined experience, focusing on core vacuuming needs without extensive attachments. It’s particularly well-suited for smaller homes or apartments where portability is key.
The NV100 features a swivel head for easy navigation around obstacles and a bagless design with a convenient dust cup. While it lacks some of the advanced features of higher-end models, it delivers reliable suction and a simple setup. Maintaining clean filters is essential for optimal performance.
It’s a budget-friendly option for those prioritizing ease of use and basic cleaning functionality.
Shark Rotator Powered Lift-Away (NV650W)
The Shark Rotator Powered Lift-Away (NV650W) combines powerful suction with versatile cleaning options. Its key feature is the Lift-Away technology, allowing the canister to be detached for portable cleaning of stairs, upholstery, and hard-to-reach areas. The powered brushroll effectively tackles pet hair and embedded dirt on carpets.
This model includes multiple attachments, enhancing its functionality for various cleaning tasks. Regular filter maintenance and brushroll cleaning are crucial for sustained performance. The NV650W is known for its strong suction and ability to transition seamlessly between floor types.
It’s a robust choice for homes with pets or those requiring deep cleaning capabilities.

Assembly and Initial Setup
Proper assembly is key to optimal performance. This section details unboxing, component identification, wand/hose attachment, and dust cup installation for your Shark.
Unboxing and Component Identification
Upon unboxing your Shark Navigator, carefully inspect all components against the included parts list. You should find the main vacuum body, the wand, the hose, a dusting brush, a crevice tool, and potentially a powered brush attachment depending on the model.
Verify the dust cup is present and undamaged, along with any filter components. Familiarize yourself with each part’s function before proceeding. The manual provides detailed diagrams illustrating each component.
Retain the packaging for potential future use, such as warranty claims or storage. Ensure no parts are missing or damaged; contact Shark customer support immediately if any issues arise. Correct identification of each component is crucial for proper assembly and operation of your new vacuum cleaner.
Attaching the Wand and Hose
To attach the wand, locate the designated port on the vacuum body – typically at the base or rear. Align the wand securely and click it into place; a firm connection ensures optimal suction. The hose connects similarly, often to the wand itself or directly to the vacuum.
Ensure a tight seal at both connection points to prevent air leaks and maintain cleaning power. Refer to the manual’s diagrams for precise port locations specific to your Shark Navigator model.
Proper attachment is vital for utilizing the vacuum’s extended reach and various attachments. Incorrectly connected components can reduce suction and hinder cleaning effectiveness; Double-check all connections before operation.
Dust Cup Installation and Removal
The dust cup easily installs by aligning it with the designated opening on the vacuum body and twisting or clicking it into place – a secure fit is crucial. To remove, locate the release button or latch, typically on the underside or side of the dust cup.
Press or slide the release mechanism while gently pulling the dust cup away from the vacuum. Empty the contents into a trash receptacle, avoiding overfilling.

Ensure the dust cup is thoroughly clean and dry before reinstalling. Proper installation and regular emptying are essential for maintaining suction power and optimal performance of your Shark Navigator.
Operating Instructions
Effectively utilize your Shark Navigator by understanding power controls, Lift-Away mode functionality, and adjustable brushroll settings for diverse floor types and cleaning needs.
Powering On and Off
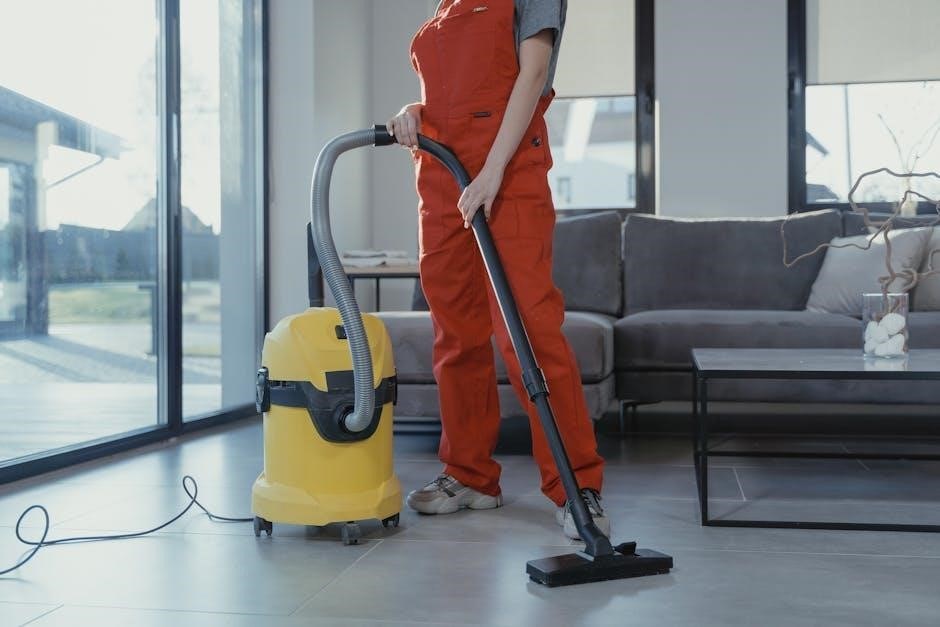
To initiate cleaning with your Shark Navigator, locate the power button, typically found on the main body of the vacuum or the handle. A single press will activate the motor, bringing the vacuum to life and ready for operation. Ensure the dust cup is properly installed before powering on to prevent any suction loss.
When finished cleaning, depress the power button again to switch the vacuum off. A complete power-off is crucial for safety and to conserve energy. Always unplug the vacuum from the electrical outlet when not in use or during maintenance procedures. This prevents accidental activation and ensures a safe user experience. Refer to your specific model’s manual for precise button locations and any indicator lights.

Utilizing Lift-Away Mode
The Lift-Away feature is a hallmark of many Shark Navigator models, offering enhanced portability for cleaning above-floor surfaces and hard-to-reach areas. To engage Lift-Away mode, detach the canister from the upright base by pressing the release button – typically located near the wand attachment point.
Once detached, the canister becomes a lightweight, handheld vacuum. Attach the appropriate accessory tool (crevice tool, dusting brush, etc.) to the wand or directly to the canister. This allows for versatile cleaning of upholstery, stairs, and car interiors. Remember to reattach the canister to the base to return to upright vacuuming. Always ensure a secure connection when switching modes.
Brushroll Control and Settings
Shark Navigator vacuums offer adjustable brushroll settings to optimize cleaning performance on various floor types. A ‘brushroll on’ setting provides maximum agitation for deep cleaning carpets and rugs, effectively lifting embedded dirt and debris. Conversely, a ‘brushroll off’ setting is ideal for hard floors, preventing scattering and potential scratching.

Some models feature a ‘carpet/hard floor’ switch, automatically adjusting the brushroll speed. Regularly check the brushroll for tangled hair or debris, as this can impede performance. Proper brushroll maintenance ensures efficient cleaning and extends the life of your Shark vacuum. Refer to your specific model’s manual for detailed instructions on brushroll control.

Maintenance and Cleaning
Regular maintenance – emptying the dust cup, cleaning filters, and de-tangling the brushroll – is crucial for maintaining peak suction and extending your Shark’s lifespan.
Emptying the Dust Cup
To empty the dust cup, detach it from the vacuum by locating the release button or latch – typically found on the underside or side of the cup. Press the button to release, then carefully remove the dust cup, holding it over a trash receptacle.
Ensure a controlled emptying to minimize dust dispersal. Some models feature a bottom-release door; open this directly over the trash. For others, you may need to lift the dust cup lid.
After emptying, reattach the dust cup securely, ensuring it clicks into place. Regular emptying – ideally after each use or when debris reaches the “max fill” line – maintains optimal suction power and vacuum performance. Avoid overfilling, as this can impede airflow and reduce cleaning effectiveness.
Cleaning the Filters
Maintaining clean filters is crucial for your Shark Navigator’s performance. Regularly check both the pre-motor and HEPA filters. The pre-motor filter, typically foam or felt, should be hand-washed with cold water, squeezed dry, and allowed to air dry completely – usually 24 hours – before reinstallation.
Avoid using soap or detergents. The HEPA filter captures finer particles; it cannot be washed. Replace the HEPA filter according to the manufacturer’s recommendations, generally every 6-12 months, depending on usage.
A clogged or dirty filter reduces suction and can cause the motor to overheat. Always ensure filters are fully dry before reassembling to prevent damage.
Pre-Motor Filter Maintenance
The pre-motor filter, often foam or felt, protects your Shark Navigator’s motor from dust and debris. Regular cleaning is essential. Remove the filter and gently hand-wash it in cold water, avoiding any soaps or detergents. Thoroughly rinse the filter until the water runs clear, removing all traces of dirt.
Gently squeeze out excess water – do not wring it, as this can damage the filter. Allow the pre-motor filter to air dry completely for at least 24 hours before reinstalling it into your vacuum.
A damp filter can cause motor damage. Inspect the filter for tears or damage; replace if necessary.
HEPA Filter Replacement
HEPA filters capture tiny particles, ensuring cleaner exhaust air. Unlike the pre-motor filter, HEPA filters are generally not washable and require periodic replacement. The frequency depends on usage, but typically every 6-12 months is recommended for optimal performance.
Locate the HEPA filter compartment (refer to your model’s specific manual for location). Remove the old filter and discard it properly. Insert the new HEPA filter, ensuring it’s correctly seated and aligned within the compartment.
Using a non-original or incorrect filter can compromise filtration and potentially damage your Shark Navigator. Always use genuine Shark replacement filters.
Brushroll Cleaning and De-tangling
Regular brushroll maintenance is crucial for maintaining suction and cleaning effectiveness. Hair, threads, and debris can easily wrap around the brushroll, reducing its efficiency. Always disconnect the vacuum from power before performing any maintenance.
Locate the brushroll access panel (refer to your model’s manual). Remove the brushroll and use scissors or the provided cleaning tool to carefully cut and remove tangled debris. Inspect the brushroll for damage and replace if necessary.
Ensure the brushroll is securely reinstalled before operating the vacuum. A clean brushroll ensures optimal performance and extends the life of your Shark Navigator.

Troubleshooting Common Issues
This section addresses frequent problems like suction loss, brushroll malfunctions, and overheating, offering solutions to restore your Shark Navigator’s performance quickly.
Loss of Suction
Reduced suction in your Shark Navigator often indicates a blockage or maintenance need. First, check the dust cup; a full cup drastically limits airflow. Next, inspect the filters – a clogged pre-motor or HEPA filter restricts suction power.
Ensure the hose and wand are clear of obstructions, disconnecting and visually inspecting them. Also, examine the brushroll for tangled hair or debris, as this can impede airflow. Confirm all connections are secure, as loose parts create air leaks.
If the issue persists, verify the vacuum isn’t set to a low-suction setting. Regular filter cleaning and dust cup emptying are crucial preventative measures against suction loss, maintaining optimal cleaning performance.
Brushroll Not Spinning
A non-spinning brushroll on your Shark Navigator typically stems from obstructions or mechanical issues. Initially, power off and unplug the vacuum for safety. Then, carefully inspect the brushroll for tangled hair, string, or carpet fibers – remove any debris.
Check for blockages within the brushroll housing, accessing it as outlined in the manual. Ensure the brushroll is correctly seated and clicks into place. Verify the belt isn’t broken or stretched; a damaged belt requires replacement.
If the brushroll still doesn’t spin, a motor issue might be present, requiring professional service. Regular cleaning and belt checks prevent this issue, ensuring effective floor cleaning.
Vacuum Overheating
If your Shark Navigator overheats, immediately power off and unplug the unit. Allow it to cool for at least 30 minutes before attempting to restart. Overheating often indicates a blockage restricting airflow, commonly in the hose, wand, or filters.
Thoroughly inspect and clear any obstructions. Ensure filters are clean and properly installed – a clogged filter significantly reduces airflow. Avoid vacuuming excessively hot materials or liquids. Continuous use without breaks can also contribute to overheating.
If the issue persists after addressing these points, a motor or internal component malfunction may be the cause, necessitating professional repair or service.
Safety Precautions and Warnings
Always unplug your Shark Navigator before performing any maintenance or troubleshooting. Do not use the vacuum outdoors or on wet surfaces. Never operate with a damaged cord or plug; seek professional repair. Keep hair, loose clothing, and fingers away from moving parts.
Avoid vacuuming flammable liquids or combustible materials. Do not use the vacuum as a toy; close supervision is necessary when used near children. Ensure proper ventilation during use to prevent dust buildup. Only use manufacturer-approved accessories.

Inspect the vacuum regularly for damage. Failure to follow these precautions could result in electric shock, fire, or injury.