This comprehensive guide provides detailed instructions for installing the Aprilaire 700 Humidifier, ensuring optimal performance and proper integration with your home’s HVAC system for improved air quality.
1.1 Overview of Aprilaire 700 Humidifier
The Aprilaire 700 is a high-efficiency whole-home humidifier designed to provide optimal humidity levels for enhanced indoor air quality. It is part of the Aprilaire 700 series, which includes models like the 700A and 700M, each tailored for specific installation needs. This humidifier is compatible with forced air systems and can be installed on either the supply plenum or cold air return, offering flexibility for various home configurations. It utilizes hot water for superior evaporation and humidity distribution, ensuring consistent performance. The system features a digital control with automatic and manual operation modes, allowing users to customize settings for precise humidity control. Its compact design and energy-efficient operation make it a reliable choice for maintaining a comfortable and healthy indoor environment year-round.
1.2 Importance of Proper Installation
Proper installation of the Aprilaire 700 Humidifier is essential to ensure optimal performance, safety, and warranty validity. Improper installation can lead to issues such as electrical or plumbing leaks, reduced efficiency, and potential system damage. The warranty is void unless the humidifier is installed by a qualified heating and air conditioning contractor, as specified in the manual. Correct installation ensures accurate humidity levels, prevents over-humidification, and maintains energy efficiency. It also guarantees compliance with safety standards and manufacturer recommendations, ensuring reliable operation and longevity of the unit. Proper installation is critical for maintaining indoor air quality and protecting your investment in the system;
1.3 Key Features of the Aprilaire 700 Model
The Aprilaire 700 Model is a fan-powered humidifier designed for whole-home use, offering advanced features for optimal humidity control. It includes a digital humidifier control with automatic and manual modes, ensuring precise moisture levels. The unit is compatible with both supply plenum and cold air return installations, providing flexibility. Its compact design and quiet operation make it suitable for various home setups. The humidifier also features a high-capacity evaporator and is designed to work seamlessly with HVAC systems. Key benefits include improved indoor air quality, reduced static electricity, and enhanced comfort during dry seasons. Regular maintenance, such as replacing the water panel, ensures long-term performance and efficiency.
Pre-Installation Requirements
Ensure you have all necessary tools, materials, and safety gear before starting. Review the installation template and safety guidelines to prepare for a smooth setup process.
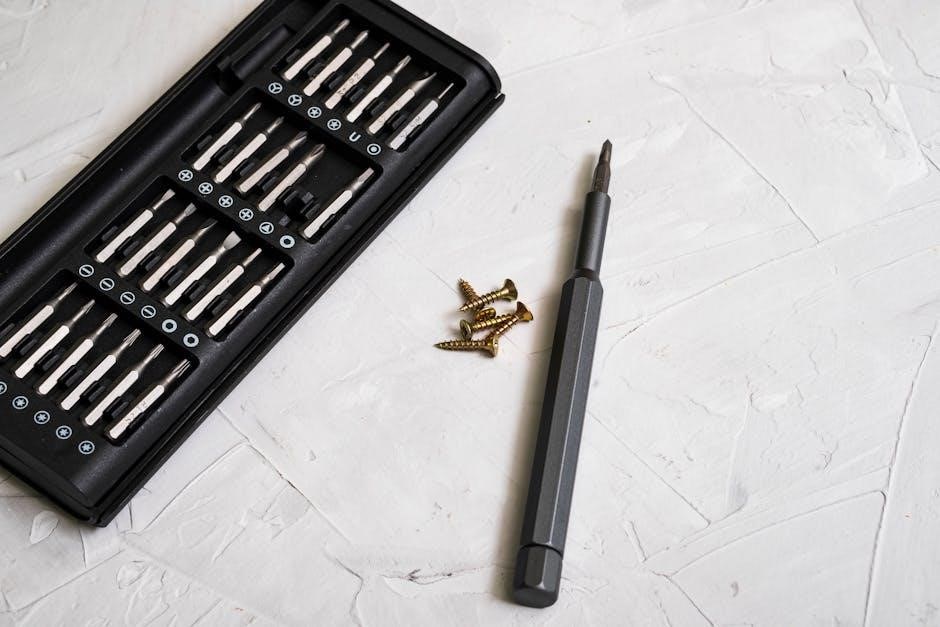
2.1 Tools and Materials Needed

To begin the installation, gather essential tools such as a drill, screwdrivers, wrenches, and pliers. Ensure you have materials like ductwork components, tubing, and electrical connectors. Additionally, have a level, measuring tape, and safety gear on hand. Refer to the installation template for specific requirements. Proper preparation ensures a smooth and efficient setup process. Always consult the manual for a detailed list to avoid missing any critical items. This step is crucial for completing the installation successfully and safely.
2.2 Safety Precautions
Before starting the installation, ensure the power and water supply to the HVAC system are turned off. Wear protective gear, including gloves and safety glasses. Avoid working in cramped or poorly ventilated spaces. Never proceed without following the manufacturer’s guidelines to prevent electrical or water damage. Improper installation can lead to safety hazards or void the warranty. If unsure about any step, consult a qualified professional. Always prioritize safety to ensure a successful and hazard-free installation process. Adhering to these precautions will protect both you and your equipment, ensuring optimal performance and longevity of the Aprilaire 700 Humidifier.
2.3 Understanding the Installation Template
The installation template provided with the Aprilaire 700 Humidifier offers a step-by-step visual guide to ensure accurate placement and alignment. It outlines critical measurements and mounting points, simplifying the process. Use the template to mark drill holes and component positions precisely, preventing errors. Familiarize yourself with the layout to avoid misalignment, which could affect performance. The template is essential for both supply plenum and cold air return installations, ensuring compatibility with your HVAC system. By following the template, you can achieve a secure and efficient installation, optimizing humidifier performance and system integration. This tool is a crucial resource for a successful setup.

Installation Options
The Aprilaire 700 can be installed on either the supply plenum or cold air return, offering flexibility based on system compatibility and space requirements for optimal performance.
3.1 Supply Plenum Installation
Installing the Aprilaire 700 on the supply plenum involves mounting the unit directly to the HVAC system’s supply duct; This method ensures even moisture distribution throughout the home, leveraging the forced air system for efficient humidification. Proper sealing and alignment are crucial to prevent air leaks and maintain system efficiency. The installation template provided in the manual guides accurate placement and drilling for the humidifier. It’s recommended to use hot water (up to 140°F) for optimal performance, especially in colder climates. Ensure all electrical and plumbing connections are secure to avoid any issues during operation.
3.2 Cold Air Return Installation
Installing the Aprilaire 700 on the cold air return duct is another viable option, allowing the humidifier to draw in dry air directly from the return duct. This method ensures efficient moisture addition before the air is heated, preventing over-humidification. The installation template helps in aligning the unit correctly with the ductwork. It’s important to maintain proper sealing to avoid air leaks, which can reduce system efficiency. The use of hot water is still recommended for optimal performance, especially in colder climates. Ensure all electrical and plumbing connections are secure to prevent any operational issues. This setup integrates seamlessly with most HVAC systems, providing consistent humidity levels throughout the home.
3.3 Choosing the Best Location
Selecting the ideal location for your Aprilaire 700 Humidifier is crucial for optimal performance and ease of maintenance. Ensure the unit is accessible for future servicing and that it fits comfortably within your HVAC system layout. The humidifier should be installed in an area that allows for proper drainage and avoids water damage risks. Proximity to the HVAC system is essential for efficient operation, while also ensuring the unit does not obstruct airflow or ductwork. Avoid placing it in areas prone to freezing temperatures if using cold water. Proper placement ensures balanced humidity distribution, efficient operation, and longevity of the system.

Step-by-Step Installation Guide
This section provides a detailed, sequential approach to installing the Aprilaire 700 Humidifier, covering unpacking, mounting, electrical connections, plumbing, water panel installation, and final assembly for proper setup and functionality.
4.1 Unpacking and Inventory
Begin by carefully unpacking the Aprilaire 700 Humidifier and its components to ensure no damage occurred during shipping. Inspect the unit thoroughly for any visible damage. The package should include the humidifier, digital humidifier control, mounting hardware, installation template, and water panel. Take note of the control wiring diagram provided in the manual. Review the contents against the packing list to confirm all items are included. This step is crucial to avoid delays during installation. If any components are missing or damaged, contact the supplier immediately. Once everything is accounted for, proceed to the next step with confidence that all necessary parts are available. Proper organization now ensures a smoother installation process later.
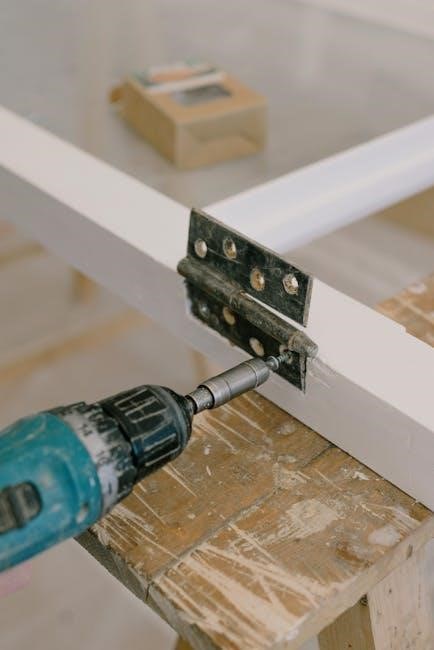
4.2 Mounting the Humidifier
Mounting the Aprilaire 700 Humidifier requires careful planning to ensure proper installation and functionality. Begin by selecting a suitable location, ideally on the supply plenum or cold air return of your HVAC system. Use the provided installation template to mark the mounting area accurately. Ensure the location allows for easy access and sufficient clearance for maintenance. Once the area is marked, secure the humidifier using the provided screws or brackets, following the manufacturer’s torque specifications. Double-check the alignment to ensure the unit is level and stable. Proper mounting is essential for efficient operation and to prevent potential issues with airflow or water distribution. Complete the process by verifying all connections are secure and the unit is ready for the next installation steps.
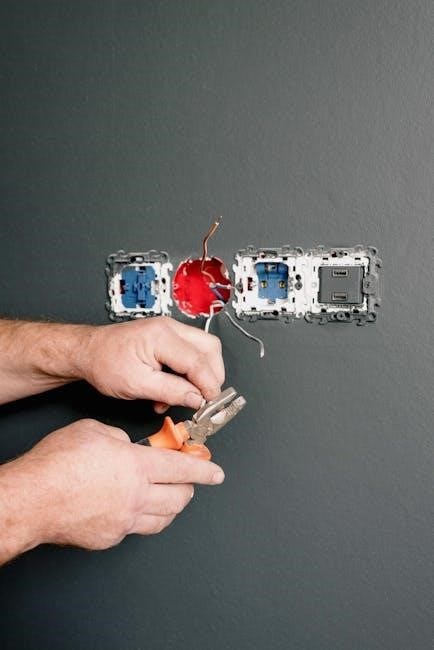
4.3 Connecting Electrical Components
Connecting the electrical components of the Aprilaire 700 Humidifier requires precision to ensure safe and proper operation. Start by identifying the electrical connections outlined in the wiring diagram provided in the manual. For models with a digital humidifier control, connect the wires to the control panel according to the specified terminals. If using a manual control, follow the instructions for mounting and wiring the control knob. Ensure all connections are secure and match the recommended voltage and amperage ratings. Turn off the power supply before handling any wires to prevent electrical shock. Once connected, verify that the control panel operates correctly and the humidifier responds to commands. Proper electrical connections are critical for reliable performance and safety. Always refer to the manufacturer’s guidelines for specific wiring instructions. Complete the process by testing the system to ensure all components function as intended. This step is crucial for avoiding malfunctions and ensuring optimal humidity control. Follow all safety precautions to avoid electrical hazards. Proper installation ensures efficient and safe operation of the humidifier. Make sure to double-check all connections before restoring power. This ensures the system operates smoothly and maintains desired humidity levels. Proper electrical setup is vital for the longevity and effectiveness of the Aprilaire 700 Humidifier. Always consult the manual for detailed wiring instructions specific to your model. Avoid any improvisations that could lead to system failure or safety risks. By following the manufacturer’s instructions, you can ensure a safe and efficient installation. This step is essential for achieving optimal performance and maintaining the warranty. Proper electrical connections are the foundation of a successful installation. Ensure all wires are securely fastened and meet local electrical codes. This step is critical for the safe and efficient operation of the humidifier. Proper installation ensures reliable performance and longevity of the system. Always follow the manufacturer’s guidelines for electrical connections to avoid any issues. This step is crucial for achieving optimal results and maintaining the warranty. Proper electrical setup ensures the humidifier operates safely and efficiently. Follow the wiring diagram and instructions carefully to complete this step successfully. This ensures the system functions as intended and provides consistent humidity control. Proper electrical connections are essential for the safe and efficient operation of the Aprilaire 700 Humidifier. Always refer to the manual for specific instructions and guidelines. This step is critical for a successful installation and optimal performance. Proper electrical connections ensure the system operates safely and efficiently. Follow the manufacturer’s instructions to avoid any issues. This step is essential for achieving optimal results and maintaining the warranty. Proper electrical setup is vital for the longevity and effectiveness of the humidifier. Always consult the manual for detailed wiring instructions specific to your model. Avoid any improvisations that could lead to system failure or safety risks. By following the manufacturer’s instructions, you can ensure a safe and efficient installation. This step is essential for achieving optimal performance and maintaining the warranty. Proper electrical connections are the foundation of a successful installation. Ensure all wires are securely fastened and meet local electrical codes. This step is critical for the safe and efficient operation of the humidifier. Proper installation ensures reliable performance and longevity of the system. Always follow the manufacturer’s guidelines for electrical connections to avoid any issues. This step is crucial for achieving optimal results and maintaining the warranty. Proper electrical setup ensures the humidifier operates safely and efficiently. Follow the wiring diagram and instructions carefully to complete this step successfully. This ensures the system functions as intended and provides consistent humidity control. Proper electrical connections are essential for the safe and efficient operation of the Aprilaire 700 Humidifier. Always refer to the manual for specific instructions and guidelines. This step is critical for a successful installation and optimal performance. Proper electrical connections ensure the system operates safely and efficiently. Follow the manufacturer’s instructions to avoid any issues. This step is essential for achieving optimal results and maintaining the warranty. Proper electrical setup is vital for the longevity and effectiveness of the humidifier. Always consult the manual for detailed wiring instructions specific to your model. Avoid any improvisations that could lead to system failure or safety risks. By following the manufacturer’s instructions, you can ensure a safe and efficient installation. This step is essential for achieving optimal performance and maintaining the warranty. Proper electrical connections are the foundation of a successful installation. Ensure all wires are securely fastened and meet local electrical codes. This step is critical for the safe and efficient operation of the humidifier. Proper installation ensures reliable performance and longevity of the system. Always follow the manufacturer’s guidelines for electrical connections to avoid any issues. This step is crucial for achieving optimal results and maintaining the warranty. Proper electrical setup ensures the humidifier operates safely and efficiently. Follow the wiring diagram and instructions carefully to complete this step successfully. This ensures the system functions as intended and provides consistent humidity control. Proper electrical connections are essential for the safe and efficient operation of the Aprilaire 700 Humidifier. Always refer to the manual for specific instructions and guidelines. This step is critical for a successful installation and optimal performance. Proper electrical connections ensure the system operates safely and efficiently. Follow the manufacturer’s instructions to avoid any issues. This step is essential for achieving optimal results and maintaining the warranty. Proper electrical setup is vital for the longevity and effectiveness of the humidifier. Always consult the manual for detailed wiring instructions specific to your model. Avoid any improvisations that could lead to system failure or safety risks. By following the manufacturer’s instructions, you can ensure a safe and efficient installation; This step is essential for achieving optimal performance and maintaining the warranty. Proper electrical connections are the foundation of a successful installation. Ensure all wires are securely fastened and meet local electrical codes. This step is critical for the safe and efficient operation of the humidifier. Proper installation ensures reliable performance and longevity of the system. Always follow the manufacturer’s guidelines for electrical connections to avoid any issues. This step is crucial for achieving optimal results and maintaining the warranty. Proper electrical setup ensures the humidifier operates safely and efficiently. Follow the wiring diagram and instructions carefully to complete this step successfully. This ensures the system functions as intended and provides consistent humidity control. Proper electrical connections are essential for the safe and efficient operation of the Aprilaire 700 Humidifier. Always refer to the manual for specific instructions and guidelines. This step is critical for a successful installation and optimal performance. Proper electrical connections ensure the system operates safely and efficiently. Follow the manufacturer’s instructions to avoid any issues. This step is essential for achieving optimal results and maintaining the warranty. Proper electrical setup is vital for the longevity and effectiveness of the humidifier. Always consult the manual for detailed wiring instructions specific to your model. Avoid any improvisations that could lead to system failure or safety risks. By following the manufacturer’s instructions, you can ensure a safe and efficient installation. This step is essential for achieving optimal performance and maintaining the warranty. Proper electrical connections are the foundation of a successful installation. Ensure all wires are securely fastened and meet local electrical codes. This step is critical for the safe and efficient operation of the humidifier. Proper installation ensures reliable performance and longevity of the system. Always follow the manufacturer’s guidelines for electrical connections to avoid any issues. This step is crucial for achieving optimal results and maintaining the warranty. Proper electrical setup ensures the humidifier operates safely and efficiently. Follow the wiring diagram and instructions carefully to complete this step successfully. This ensures the system functions as intended and provides consistent humidity control. Proper electrical connections are essential for the safe and efficient operation of the Aprilaire 700 Humidifier. Always refer to the manual for specific instructions and guidelines. This step is critical for a successful installation and optimal performance. Proper electrical connections ensure the system operates safely and efficiently. Follow the manufacturer’s instructions to avoid any issues. This step is essential for achieving optimal results and maintaining the warranty. Proper electrical setup is vital for the longevity and effectiveness of the humidifier. Always consult the manual for detailed wiring instructions specific to your model. Avoid any improvisations that could lead to system failure or safety risks. By following the manufacturer’s instructions, you can ensure a safe and efficient installation. This step is essential for achieving optimal performance and maintaining the warranty. Proper electrical connections are the foundation of a successful installation. Ensure all wires are securely fastened and meet local electrical codes. This step is critical for the safe and efficient operation of the humidifier. Proper installation ensures reliable performance and longevity of the system. Always follow the manufacturer’s guidelines for electrical connections to avoid any issues. This step is crucial for achieving optimal results and maintaining the warranty. Proper electrical setup ensures the humidifier operates safely and efficiently. Follow the wiring diagram and instructions carefully to complete this step successfully. This ensures the system functions as intended and provides consistent humidity control. Proper electrical connections are essential for the safe and efficient operation of the Aprilaire 700
4.4 Plumbing Installation
Proper plumbing installation is essential for the Aprilaire 700 Humidifier to function effectively. Begin by connecting the water supply line to the humidifier, ensuring it is securely attached to the water inlet valve. Install a saddle valve on the home’s water supply line to provide a reliable water source. Next, connect the drain line to the humidifier’s drain outlet and direct it to a suitable drain location, such as a floor drain or condensate pump. For optimal performance, use hot water (up to 140°F) to improve evaporation, especially in colder climates. Ensure all plumbing connections are tight to prevent leaks. After installation, flush the system to remove any debris. Refer to the manual for specific plumbing requirements and local code compliance. Proper plumbing ensures efficient water flow and drainage, which are critical for maintaining the humidifier’s performance and longevity. Always follow the manufacturer’s guidelines for plumbing connections to avoid issues. This step is vital for ensuring the system operates safely and efficiently.
4.5 Installing the Water Panel
Installing the water panel is a critical step in the Aprilaire 700 Humidifier setup. Begin by removing the old water panel, if applicable, and prepare the humidifier for the new one. Align the water panel with the humidifier’s housing, ensuring it fits securely into the designated slots. Gently push the panel into place until it clicks, confirming it is properly seated. Next, connect the water level sensor to the panel, ensuring it is firmly attached to maintain accurate humidity readings. Finally, test the panel by running water through the system to ensure proper function. Regularly replace the water panel as recommended to maintain efficiency and prevent mineral buildup. This step ensures the humidifier operates effectively, providing consistent humidity control for your home. Proper installation of the water panel is essential for optimal performance and longevity of the system.
4.6 Final Assembly and Connections
After completing the previous steps, proceed with the final assembly by ensuring all components are securely fastened. Reconnect any ductwork or plumbing that was temporarily removed during installation. Verify that the water panel is properly seated and the electrical connections are tight. Double-check the humidifier’s alignment with the installation template to ensure accuracy. Finally, restore power to the system and test all connections for leaks or loose fittings. Once everything is confirmed to be in order, the humidifier is ready for operation. Properly securing all connections and components is crucial for optimal performance and longevity of the Aprilaire 700 system.

Wiring and Control Setup
Connect the humidifier’s electrical components according to the wiring diagram, ensuring compatibility with your HVAC system. Configure the digital or manual control for optimal humidity management.
5.1 Digital Humidifier Control Wiring
Begin by connecting the digital humidifier control to your HVAC system. Follow the wiring diagram to ensure proper connections. Connect the control to the humidifier and the HVAC system. Set up the digital display according to the manufacturer’s instructions. Program the control for automatic or manual operation. Test the system to ensure it responds correctly to humidity levels. Use the touchscreen interface to configure settings for optimal performance. Ensure all wires are securely connected to avoid electrical issues. Refer to the manual for detailed wiring instructions and troubleshooting steps. Proper wiring ensures accurate humidity control and system efficiency.
5.2 Manual Control Wiring
For manual control wiring, mount the control in the return duct or on a wall in the living space. Remove the knob and cover to access the wiring terminals. Connect the wires according to the installation instructions and wiring diagram provided. Ensure the control is properly grounded and all connections are secure. Test the system to confirm manual operation works correctly. This setup allows for straightforward humidity management without advanced automation. Refer to the manual for specific wiring details and troubleshooting tips. Proper installation ensures reliable performance and accurate humidity control. Follow safety guidelines to avoid electrical issues during the wiring process.
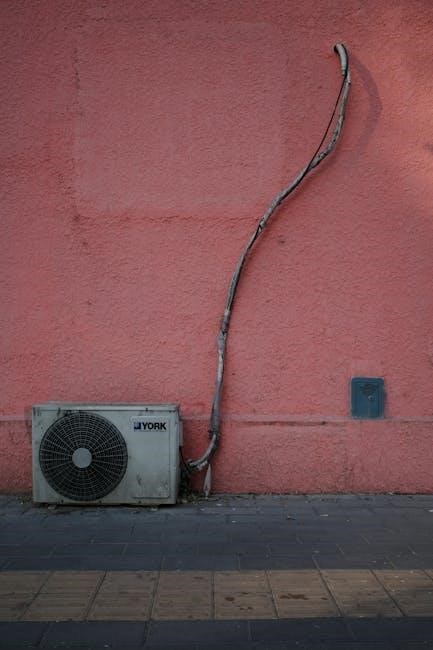
5.3 Integrating with HVAC Systems
Integrating the Aprilaire 700 with your HVAC system ensures seamless operation and optimal humidity control. For heat pump systems, use hot water to supplement reduced supply air temperature, enhancing evaporation. Mount the humidifier on the supply plenum or cold air return, considering space and serviceability. The digital control offers advanced features like automatic mode, which adjusts humidity based on outdoor temperatures. Ensure the system is installed by a qualified technician to maintain warranty validity and prevent misapplication. Proper integration ensures the humidifier works in harmony with your HVAC, providing consistent comfort and improving indoor air quality. Follow the installation template for precise setup and connections.
Post-Installation Steps
After installation, test the humidifier to ensure proper function, program the control for desired settings, and perform a system checkout to confirm everything operates smoothly with your HVAC system.
6.1 Testing the Humidifier
After completing the installation, turn on the humidifier and check for water flow and mist production. Ensure the unit responds correctly to the control settings. Verify that the humidistat or digital control accurately maintains the desired humidity levels. Check for any leaks in plumbing connections and electrical components. Test both automatic and manual modes to confirm proper operation. Refer to the control manual for specific testing procedures. Ensure all safety features function as intended. If issues arise, consult the troubleshooting section or contact a qualified technician. Proper testing ensures efficient and safe operation of your Aprilaire 700 humidifier.
6.2 Programming the Humidifier Control
Programming the Aprilaire 700 humidifier control involves setting the desired humidity level and operational modes. For the Digital Humidifier Control, navigate through the menu-driven interface to set preferences such as humidity level, fan activation, and automatic mode. Ensure the control is synced with your HVAC system for optimal performance. For the Manual Control, simply adjust the knob to the desired humidity level. Refer to the control manual for detailed step-by-step instructions. After programming, verify that the humidifier responds accurately to the setpoints. Proper programming ensures efficient humidity management and integrates seamlessly with your home’s climate control system for enhanced comfort.
6.3 System Checkout
After installation and programming, perform a system checkout to ensure all components function correctly. Verify water flow, electrical connections, and proper drainage. Check for leaks in plumbing and electrical connections. Test the humidifier’s operation in both automatic and manual modes, if applicable. Ensure the control panel displays accurate humidity levels and responds to adjustments. Verify that the humidifier activates and deactivates as expected with your HVAC system. Run a test cycle to confirm smooth operation and proper integration with your home’s climate control system. Address any issues promptly to ensure optimal performance and reliability. A successful checkout confirms the system is ready for long-term use and provides the intended benefits of improved indoor air quality and comfort.

Maintenance and Upkeep
Regular maintenance ensures optimal performance and longevity of the Aprilaire 700. Clean the water panel, inspect for wear, and replace components as needed annually.
7.1 Cleaning the Water Panel
Cleaning the water panel is crucial for maintaining the Aprilaire 700’s performance and preventing mold growth. Turn off the power and water supply before removal. Soak the panel in a vinegar solution to dissolve mineral buildup, then scrub gently with a soft brush. Rinse thoroughly and reinstall. Regular cleaning every 1-3 months ensures optimal humidity levels and system efficiency. Neglecting this step can lead to reduced effectiveness and potential mold issues. Always follow the manufacturer’s recommendations for cleaning frequency and methods to maintain your humidifier’s longevity and performance.
7.2 Replacing the Evaporator
Replacing the evaporator in your Aprilaire 700 is essential for maintaining efficiency and preventing mineral buildup. Turn off the power and water supply before starting. Remove the water panel and gently pull out the old evaporator, taking care not to damage surrounding components. Install the new evaporator by aligning it properly and securing it according to the manufacturer’s instructions. Dispose of the old evaporator responsibly. Regular replacement, typically every 5 years, ensures optimal performance and prevents mold growth. Always refer to the manual for specific guidance, and consider professional assistance if unsure. Proper installation ensures reliable humidity control and system longevity.
7.3 Annual Maintenance Checklist
Annual maintenance is crucial for ensuring your Aprilaire 700 operates efficiently. Start by cleaning or replacing the water panel to prevent mineral buildup and mold growth. Inspect and clean the humidistat to ensure accurate humidity readings. Check the drain system for blockages and ensure proper water flow. Inspect the electrical connections and wiring for any damage or wear. Replace the evaporator pad every 5 years or as needed. Finally, check the filter and clean or replace it as recommended. Regular maintenance prevents issues like water leaks, mold, and reduced performance. Refer to the manual for specific guidelines and ensure all tasks are completed by a qualified technician if necessary. Proper upkeep extends the life of your humidifier and maintains indoor air quality.
Troubleshooting Common Issues
This section addresses frequent problems like no water flow, incorrect humidity levels, and electrical or plumbing leaks, helping you resolve issues quickly and effectively.
8.1 No Water Flow
If your Aprilaire 700 humidifier isn’t producing water, check the water supply shut-off valve to ensure it’s fully open. Verify the water supply line isn’t kinked or blocked. Inspect the solenoid valve for proper operation, as it may be faulty or require replacement. Ensure the saddle valve is installed correctly and not leaking. Check for clogged water filters or debris in the water panel. If issues persist, consult the installation manual or contact a qualified technician to diagnose electrical or plumbing connections. Regular maintenance, such as cleaning the water panel, can prevent future water flow problems. Always follow safety guidelines when troubleshooting.
8.2 Incorrect Humidity Levels

If the Aprilaire 700 humidifier is not maintaining the desired humidity levels, check the digital humidifier control settings. Ensure the control is set to the correct mode (Automatic or Manual) and adjust the humidity level as needed. Verify that the outdoor temperature sensor is properly installed and functioning, as this affects humidity regulation. Inspect the water panel for cleanliness and ensure it’s not clogged, which can restrict water flow. Check for proper installation of the humidifier, including alignment with the HVAC system. If issues persist, review the wiring connections or consult the installation manual for troubleshooting steps. Annual maintenance, such as replacing the evaporator, can also help restore proper humidity levels. Always ensure the system is sized correctly for your home to avoid over or under-humidification. If problems continue, contact a qualified technician to assess and correct the issue.